
Hi Today we will make a set of headphones with PET plastic bottles and some other recycled materials!
Remember this project is designed to recycle things please DO NOT buy the main materials, plastic bottles are always a left over when you buy soda and the speakers you can get on any computer district for free.
!!!you will use low to moderate dangerous tools be carefull and use the propper industrial safety gear!!!
First lets make a checklist of the materials you will need:
-Solder wire.
-Solder flux.
-Epoxy resin.
-Epoxy putty.
-Wire.
-3.5 audio Jack.
-Audio electric wire.
-Solder flux.
-Epoxy resin.
-Epoxy putty.
-Wire.
-3.5 audio Jack.
-Audio electric wire.
Now the tools you will need:
-Solder iron.
-Mototool.
-Cutter.
let's start!
-Solder iron.
-Mototool.
-Cutter.
let's start!
First lets talk about speakers, laptops have a variety of speakers some even have awesome quality ones like Skullcandy, JBL, Bose, etc. so if you have a laptop that is beyond repair you can gather the speakers from it also in every city and town there is always a computer district or at least a computer "guy" that will give them for free or for a very cheap price.


Use the cutter to remove the plastic, be vary carefull not to harm the speakers, if they are glued hard help the process with the mototool using a carbide disc, the speakers will be soldered to a wire in order to be connected to de laptop, use the solder iron to unsolder those wires, most speakers have a + and - symbol so you know where to solder your audio wire if they dont, mark the places before, remember that the black wire is always "ground" and must be marked with a " -" the signal wire should be red, white and in some rare cases yellow or blue, mark the place those are soldered with a "+"
Now is soda time!
Now is soda time!
I choosed the biggest bottle because i want to be comfy when i use the headphones.
Im from Colombia and one of the most popular soda brands here is "Colombiana" but if any soda manufacturer reads this and wants to sponsor this project i would be more than happy to use their bottles on the projects!

Now Cut the bottle as shown in the following picture:

Is obvious that the cut is not going to be perfect, so we will use a simple trick,
measure the size you want, longer if you want bigger "cover the entire ear" headphones, shorter if you like the "just over the ear" kind.
once you have the measure you like, take a marker and grab it firmly with the ruler on the spot you choosed, then just rotate the piece marking a straight line, just use the line you did as a cut pattern, the pieces should be perfectly cutted and have the measure you selected.


Pet Plastic bottles are easy to cut with scissors and i recommend to do so because the cutter will not give the precision and is far more dangerous to manipulate.
Remember that the bottle used to have beberages with sugar, so please wash the pieces!!!
Use a little epoxy putty to make a line on the border, that is meant to give extra strength to the piece, leave it dry for a day, i know it will look strong enough after an hour but is better to let it get as hard as it can be.

Now is time for some wire modeling, please notice that the form i gave it is designed to make the headphones adjustable, if you like you can let yours be static, the lower measure is given by the plastic pieces you just did because we will place the wire pieces at the center of the plastic, how long you want the wire pieces is up to you, the longer the more you can stretch the headphones.


The following pictures will show you how and where to open the holes for the wire pieces, notice that the bottles have a "line" that shows where the mold closed when it was made, those are at the exact center of the bottle (Y axis)and you can use them as guide.
you can use your soldering iron to open the holes, please clean it after.


now lets make the diadem part, i did 2 because the wire is not very strong to keep its form besides having 2 is much more comfortable.
I also got a black tube at my local hardware store i used it to cover the wire so my headset looks better and to hide the electric wire, i tried other recycled materials too, like straws and hospital iv tube, the staws work but look awfull, the hospital iv works like a charm and let you see the wire, so is just aesthetical choice to pick which to use.


hey we forgot to get the electric wire inside the tube, so we will use a simple trick, paste the cable to the wire with some adhesive tape, then pass it through the tube, remember to use audio cable for this project!


Next use the wire cutter to leave some marks on the wire, those will help the epoxy hold it better, do that with both pieces.

Now we will use two plastic bottle tops, first peel the inside as shown.


Now use the mototool and a carbide disc to cut both of the like this

now put together the wire holders with the bottle tops like this


please notice that the lateral "beds" we did on the tops serve to slide the top over the wire holders, the upper hole is made to place the diadems once we put them together.
use the epoxy putty to paste the diadems, make a rectangle covering the wire that you marked with the wire cutter, the headphones will be comfy if you leave some degree of separation between the diadems, if you like you can add some foam later and cover it with the cloth of your preference.

now paste the diadems inside the tops with epoxy. please be carefull to not paste the mobile wire holder, as you can see i used coins to hold it better.

now is time for the cables, and the speakers, at this point you must be carefull because you will be working with half assembled headphones, solder the wires like this:
to see how to solder the wires click here.
as you can see i pasted the speakers to the plastic, this is just for testing purposes and the sound will have bad quality because we need an acoustic shell.

now is time to place the foam, i got mine from an old pair of headphones that went far beyond the poit of repair, but the foam was clearly in good shape, i know not everyone has that kind of stuff at home so you can make one with an old t-shirt and some sewing skills.

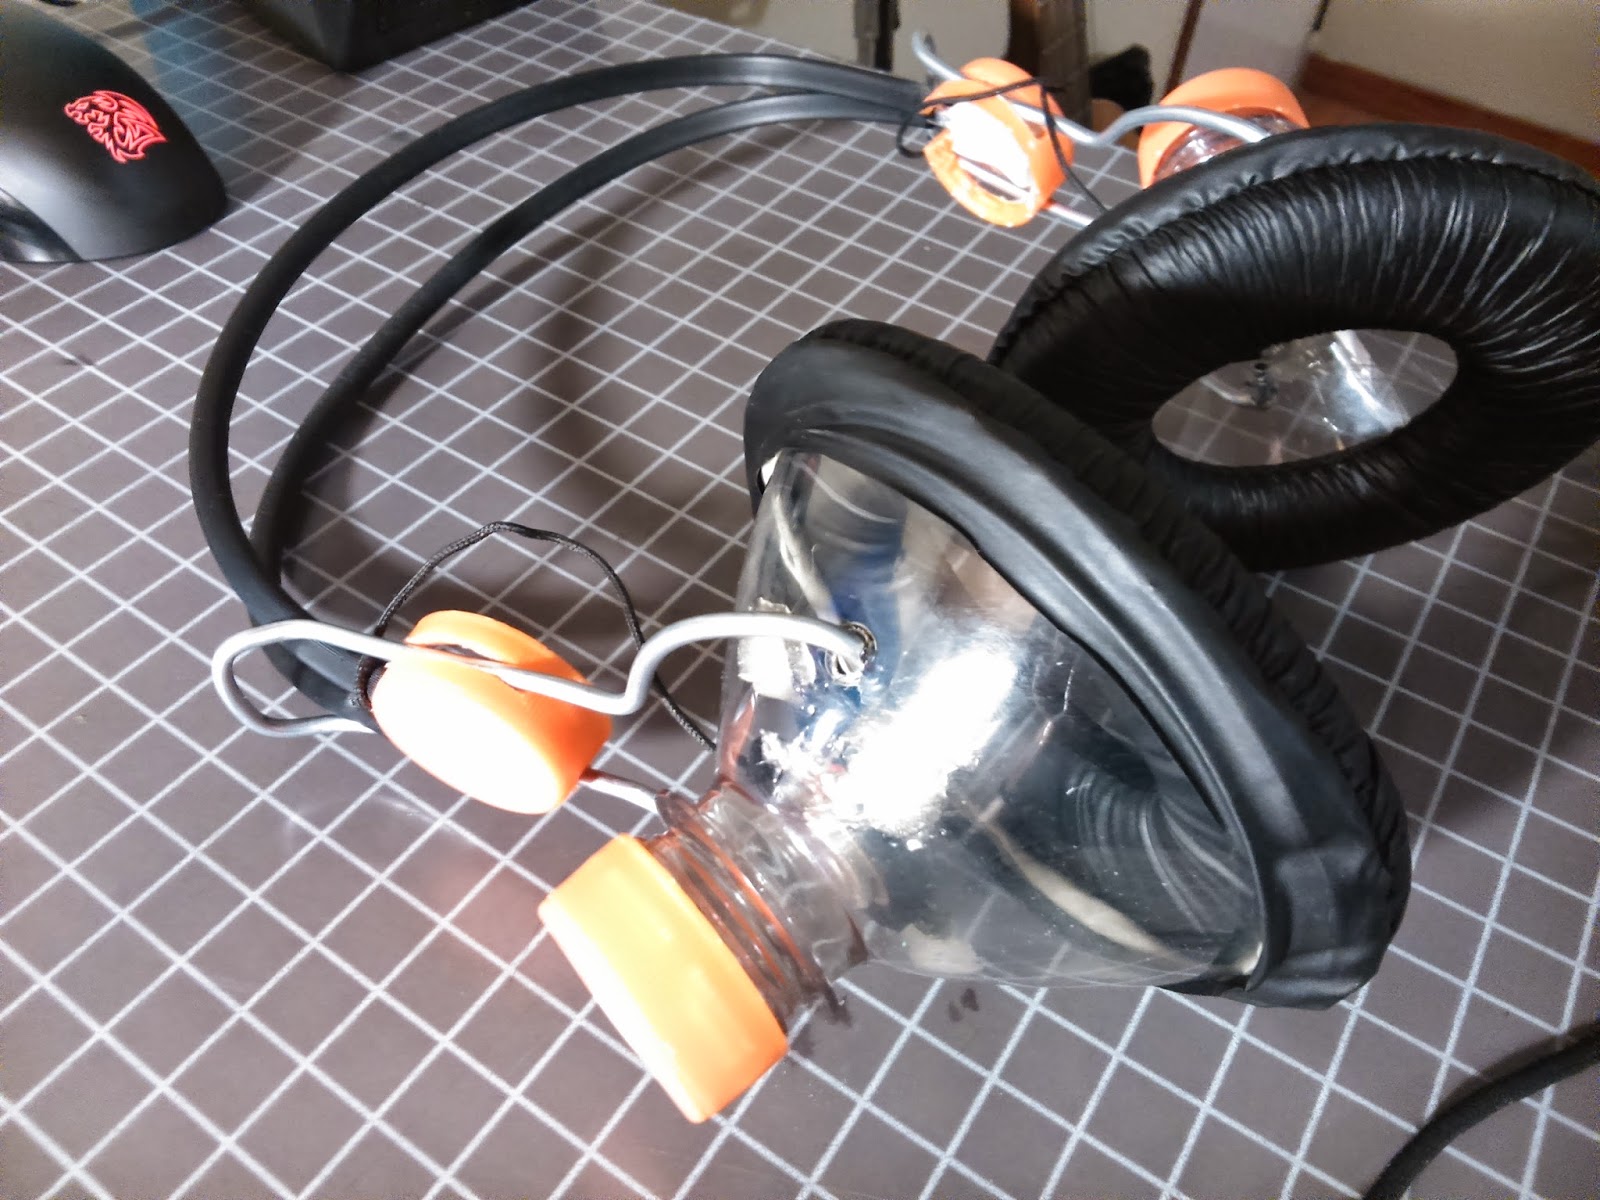
try different acoustic shells untill you get the best sound, i used a second pair of bottle tops on mine and glued them with some epoxy, so far they have an outstanding sound quality, after testing with some variations i came to understand some tricks:
-the closer to the ear the better.
-leave room behind the speaker so air can flow and give some good bass kick.
-people will stare... really
-people will love them when they hear them and see the work behind them
-the closer to the ear the better.
-leave room behind the speaker so air can flow and give some good bass kick.
-people will stare... really
-people will love them when they hear them and see the work behind them
keep following and enjoy :D
Facebook:https://www.facebook.com/Alternative-Recycling-Lab-965675563525998/?fref=ts
Facebook:https://www.facebook.com/Alternative-Recycling-Lab-965675563525998/?fref=ts
Youtube (coming soon)
No hay comentarios:
Publicar un comentario